1. Chuẩn bị:
- Thiết bị cài app: Bắt buộc là thiết bị Android như: điện thoại, máy tính bảng, máy pos cầm tay màn hình tính tiền…. Analy chưa hỗ trợ kết nối máy in trên các thiết bị ios.
- Máy in: Cần cắm dây USB từ máy in vào thiết bị chính kết nối máy in, mở nguồn máy in.

2. Cách kết nối máy in
Bước 1:
Vào mục menu (3 gạch góc trái màn hình => kéo xuống mục Quản lý thông tin => Chọn loại máy in muốn cài đặt:
Nếu muốn cài đặt máy in bill thì chọn Cài đặt máy in đơn. Nếu bạn muốn cài đặt máy in tem thì chọn Cài đặt máy in tem nhãn.

Bước 2: Chọn loại máy in: Máy in Xprinter (USB) => bấm Tìm kiếm máy in USB
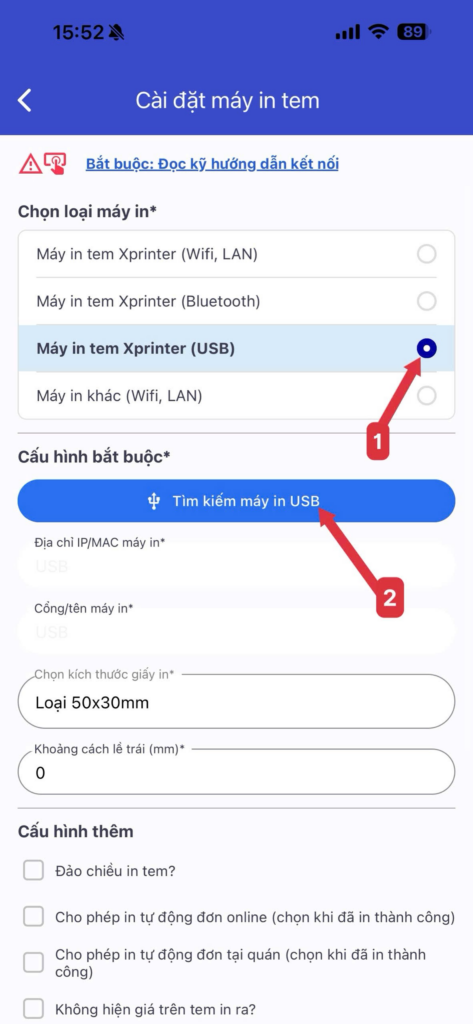
Step 3: At this point, the screen may display 2–3 device codes (if your POS device has multiple USB cables connected). => Tap the first code to test => Then tap the button Print test to check printer connectionto check if the paper is printed from the correct printer you want to connect to.
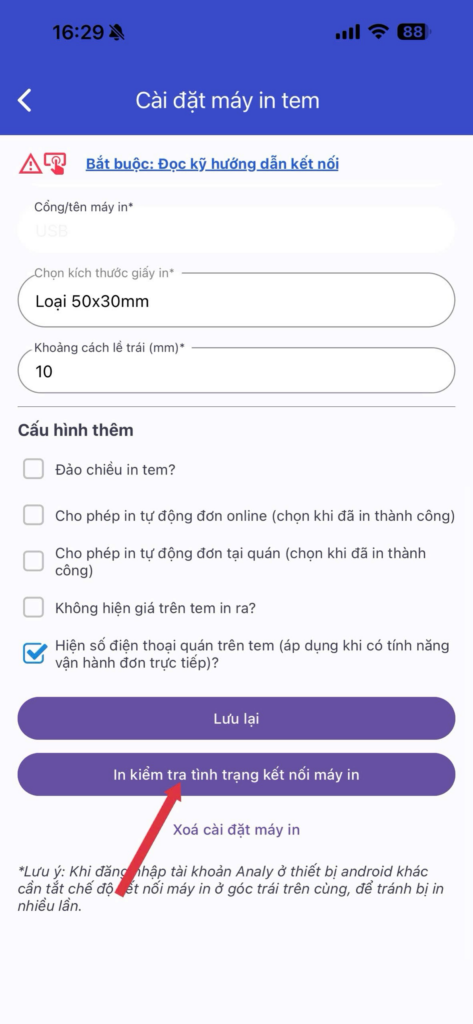
Bước 4: Nếu ra tem hoặc bill đúng rồi thì tick vào các ô Cho phép in tự động đơn Online hoặc Tại quán tùy nhu cầu => Bấm LƯU LẠI.
Nếu giấy ra chưa đúng thì quay lại bấm Tìm kiếm mã mãy in USB & chọn lại mã thứ 2 => Tiếp tục bấm Print test to check printer connection.
Bước 5: Tiếp tục vào mục Lịch sử ở màn hình ngoài => Vào 1 đơn hàng bất kì bấm in đơn/ in tem của đơn hàng đó để kiểm tra xem nội dung in ra đã được chưa.
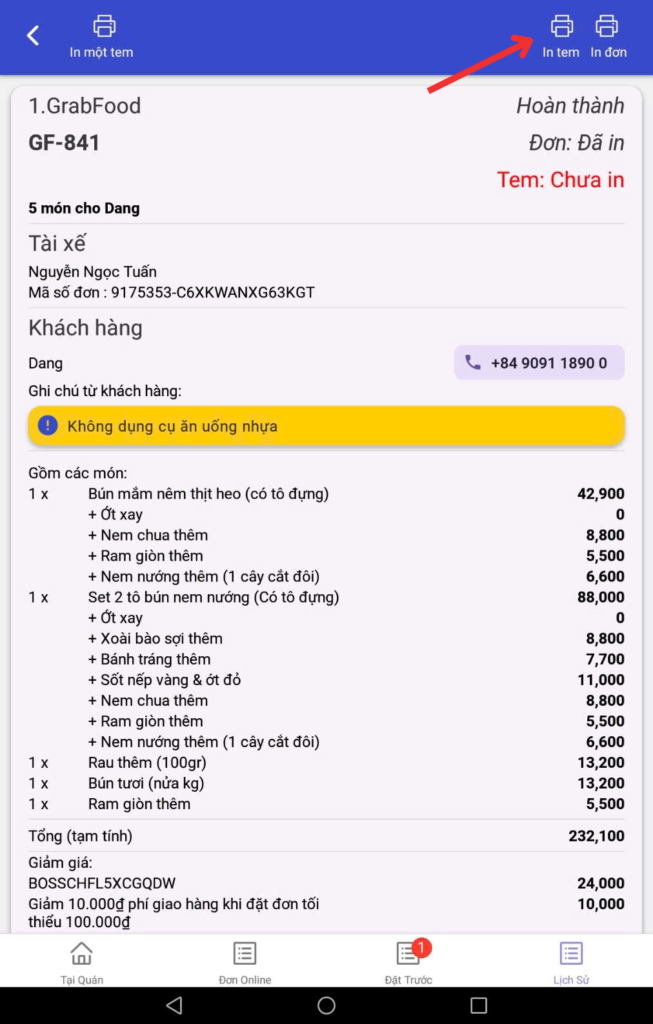
*Print label button: to print labels for all items in an order.
*Print single label button: reprints the label of a specific item, useful for fixing misaligned, damaged, or incorrect labels.
3. Cách kết nối với máy in bill
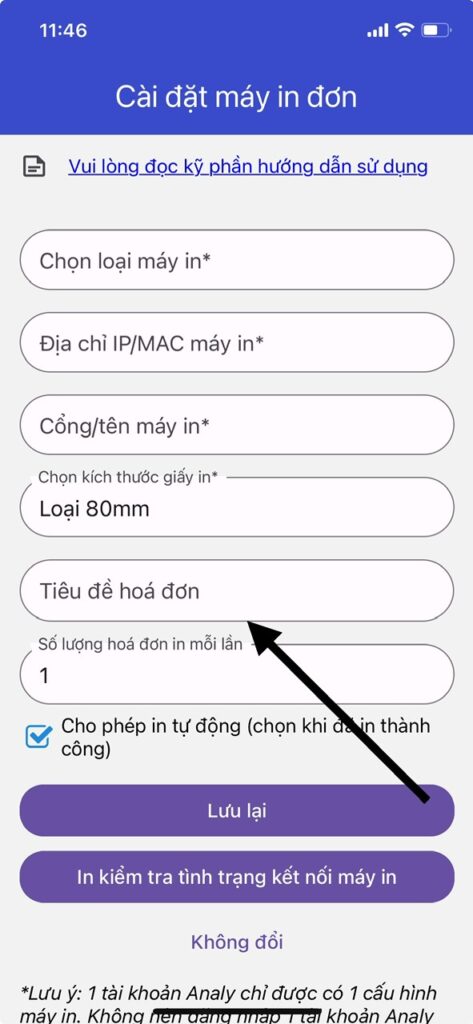
Step 6: Configure additional display content:
Update store information such as phone number and address in the bill header section to help customers contact the store more easily. Example: “Thank you for supporting our store. If you have any issues, please don't hesitate to contact us…”
*Nếu nội dung món đang nằm sát mép tem => Tại mục Cài đặt máy in tem nhãn => Khoảng cách lề trái: Lần lượt nhập 10, 15….Lưu lại. Cho đến khi nội dụng hiển thị như mong muốn.
Step 7: Log out and exit the app, then log back in. Turn the printer off and on again.